You are here: Home > How to Teach PSB > Lesson Elements
|
||||||
The Picture Smart
Bible
|
|
Click |
John Master Drawing |
|
for |
John Student Sheet |
|
Samples |
John Script |
Each book of the Bible includes:
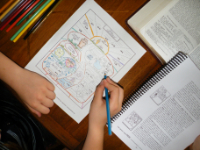
1. Master Drawing. This finished picture will guide your teaching and help you draw a student sheet along with your children. Some are full page and some are half page.
 2. Student Sheet. Located in the
back of “The Picture-Smart Bible,” student sheets are lighter dot-to-dot type illustrations that match
theMaster Drawings. In most cases, your "drawing path" will
begin in the upper left corner, progressing back and forth across the page. Children should be encouraged to
draw only when you draw.
3. Script: Orientation Paragraph. Each script begins with an orientation paragraph to help you and your children understand how each book relates to the previous book. Therefore,these paragraphs help children see the Bible as a whole.
You do NOT need to be a Bible scholar!
4. Script: the Commentary (center section). It’s this section that you can read word-for-word or paraphrase as you teach each book of the Bible. It will depend on how much you study the lesson. All direct Scripture quotations (shown in italics), are from the New King James Bible. Partial references are not italicized. Directions include which Scriptures to read aloud. Occasionally, some events are grouped slightly out of order to improve memorable illustrations. But, details are still accurately portrayed.
5. Script: The Good News Starburst. A unique feature of The Picture-Smart Bible is that Jesus Christ is highlighted throughout the Old Testament. He is so often missed in the OT. The "Good News Starbursts" are enriching discussion topics, revealing that God’s sovereign hand of hope is ever present.The Starburst (a direct reference to Jesus) appears in every OT book. God made it ABUNDANTLY clear that His Son should receive preeminence in every book. Every book in the Bible, including some of the most severe and scathing Old Testament prophets, contains good news. Luke reported that "beginning at Moses and all the prophets, He (Jesus) expounded to them in all the Scriptures the things concerning Himself" (Luke 24:27).
You do NOT need to be an artist!
6. Script: Directions for Drawing. Within the commentary, you are told when and what to write, draw, or trace on the Student Sheets.
7. Script: Wide Margin. Every page has space for you to write hints and things you learn in your study and devotions that you want to include in your teaching. Although it’s not necessary to study anything but this Bible, your presentation can be greatly enriched through personal study and the use of other resources.
8. Script: Applications for Life. At the end of every script are suggested discussion questions designed to help students apply concepts from each book to their lives (II Tim. 3:16-17). You may, of course, choose to make practical applications throughout your lesson rather than waiting until the end.
9. Script: Thumbnail Drawings.Located in the left margin of the script, these drawings show how the illustration will look as each element is added. These small, progressive illustrations, combined with written directions in the script, provide complete step-by-step drawing instructions.
